Note. The gearbox is removed through the top of the car.
Removing
Place the car on a lift. Lift and secure it.
Remove:
- protection under the engine;
- front wheels;
- CV joints.
Remove:
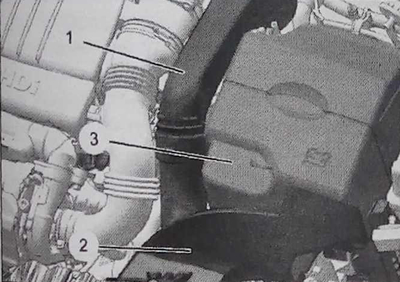
- intake air hoses (1), (2);
- decorative battery cover (3);
- rechargeable battery.
Loosen the mounting bolts (4) battery supports.
Move the wiring harness assembly away from the ECU (5).
Remove the battery support bracket (6).
Disconnect the reversing light switch and cable «masses» on the gearbox housing.

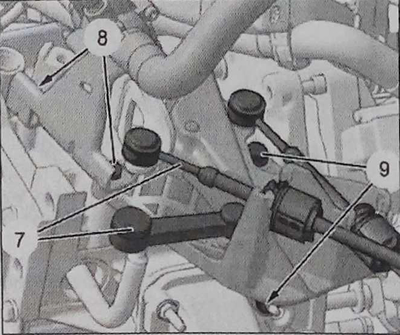
Using the tool [1], disconnect the selector rods (7).
Remove fasteners (8) coolant heater supports (depending on equipment variant).
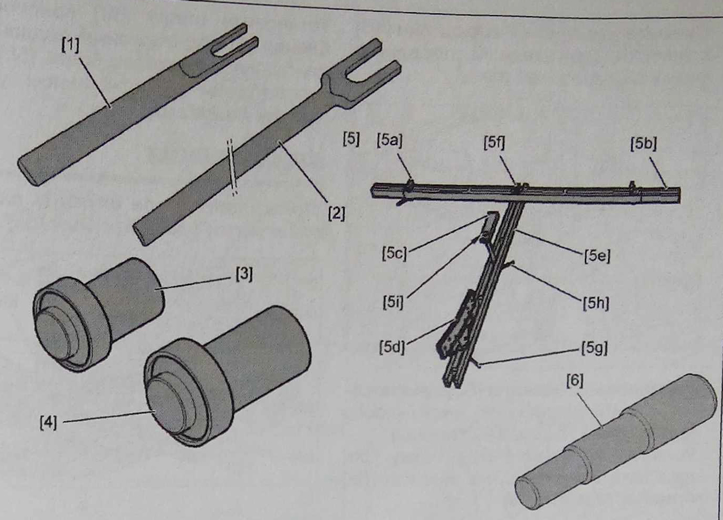
Special fixtures:
1 - tool for removing the retainers of ball bearings (diameter 10 mm) 0216-G1;
2 - tool for removing the retainers of ball bearings (diameter 13 mm) 0216-G2;
3 - mandrel for mounting the right seal at the outlet of the bridge 0317-U;
4 - mandrel for mounting the left seal at the outlet of the bridge 0317-T;
5 - lower cross member holding engine 0012;
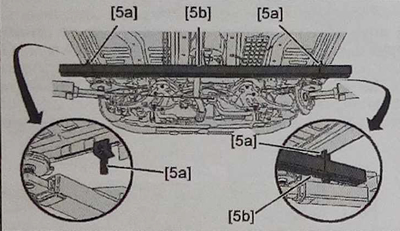
5a - clamp;
5b - transverse thrust holding the engine;
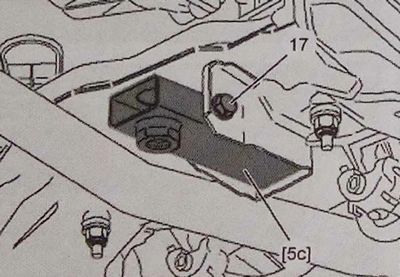
5c - support;
5d - engine support;
5e - longitudinal thrust holding the engine;
5f - bolt;
5g - bolt;
5h - safety bolt;
5i - bolt;
6 - rod for centering the friction disc of clutch 0213/0214.
Loosen the gearshift mounting bolts (9).
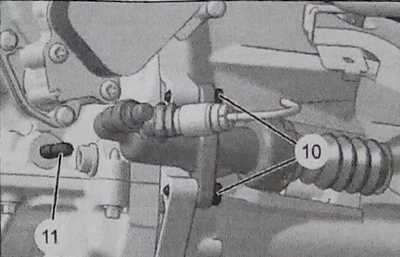
Turn away bolts (10) clutch slave cylinder.
Move the clutch slave cylinder without opening the circuit. Remove catalytic converter (see corresponding operation).
Remove the pin (11) catalytic converter mounts.
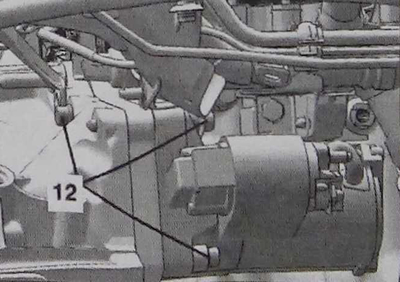
Disconnect the starter connectors. Remove fasteners (12) and starter.
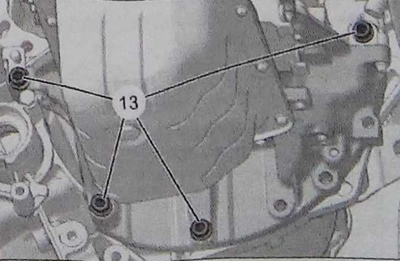
Loosen the bottom mounting bolts (13) gearboxes.
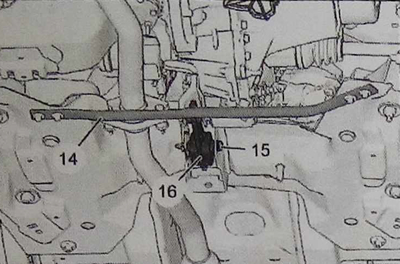
Remove safety beam 144).
Remove the bolt (15).
 |  |
Remove the jet bracket (16) engine mounts and the front frame of the sub-frame.
Position the catches [5a] of the tool [5] on the lower part of the car body (from each side).
Place the cross member [5b] of tool [5] on the hooks [5a] of tool [5].
Install the support [5c] of the tool [5] in place of the jet bracket (16).
tighten bolt (17).
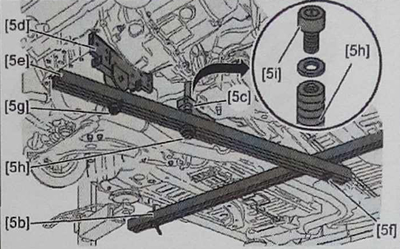
Attachment installation
Fasten the support [5d] of the attachment [5] to the stringer [5e] with the bolt [5g].
Mount the stringer [5e] of the fixture [5] on the support [5c] using the bolt [5hj.
Attach the stringer [5e] of the tool [5] to the cross member [5b] with the bolt [5f].
Screw the safety bolt [5i] onto the bolt [5h].
Position support [5d] of tool [5] under the engine oil sump with bolt [5h] (according to the direction indicated by the arrows).
Note. Turn the bolt [5h] to raise or lower the power unit.
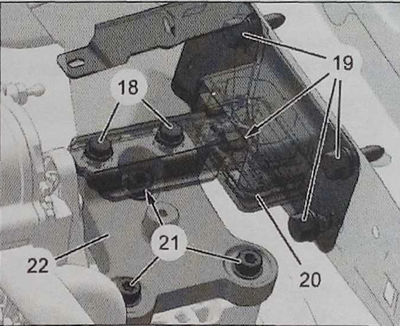
Remove:
- fastening bolts (18), (19);
- transmission elastic cushion (20);
- fixing bolts (21) intermediate support of the gearbox;
- gearbox support (22).
Remove the upper engine/gearbox mounting bolts (23).
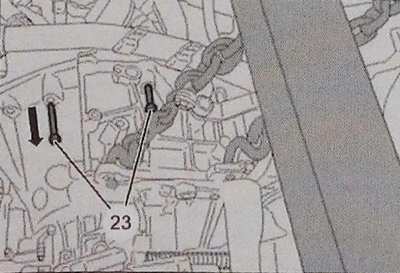
Attention. Protect the radiator with a cardboard sheet while lowering the gearbox.
Remove the gearbox.
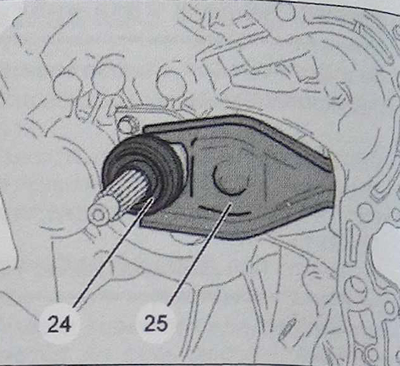
Remove the assembly - stop (24) and fork (25).
Installation
Check:
- no oil leaks at the level of the release bearing;
- no oil leaks at the level of the crankshaft oil seal.
Measure the friction disc wear.
Manually clean the input shaft and release bearing guide with a wire brush to remove all traces of oxidation.
Attention. Completely clean the input shaft along its entire length, along its entire circumference and in all its splines.
Protect the inside of the clutch housing from grease. Spray evenly «Molykote spray rapid» (aerosol) on the surface of the guide sleeve of the release bearing and input shaft.
Lubricate the grips of the clutch fork.
Remove excess grease with a rag from the top of the splines and the end of the input shaft.
Note. If excess grease is not removed, the clutch friction plate will become oily and cause noise when engaged in neutral, slipping or jerking when the clutch is engaged.
Attention. In case of reuse of the clutch disc, it is necessary to remove traces of corrosion from the hub of the disc.
Clean the threads of the bolts.
When reassembling, the thrust bearing must be located in its guide and installed in the desired position using the clutch fork.
Engage neutral gear.
Install the gearbox on the engine.
Install the parts in reverse order.
Fill the transmission through the purge port: 1.9±0.15 liters. Connect the battery.
Perform initialization of all ECUs.
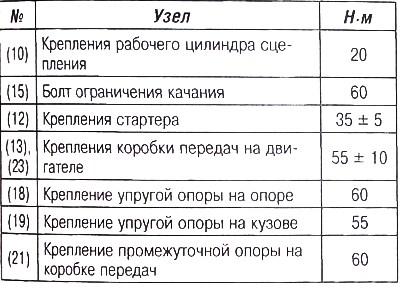
Tightening torques
