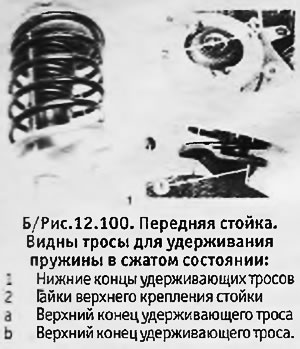
2. Skip the retaining cables (if they are used) through special holes in the top of the rack. Hook the second weight on each of the cables to the slot in the lower spring seat.
3. Loosen the 3 top strut mounting nuts without removing them yet.
4. Loosen the nuts or bolts on the desired front wheel, raise and support the front of the machine and remove the wheel.
5. Fix the drive shaft with special tool No. 8.0615 H (or similar), so that it does not come out of the final drive housing.
6. Disconnect the lower anti-roll bar link.
7. Remove the nut and bolt of the clamp securing the stub axle to the strut.
8. Open the clamp using the socket wrench handle with "square" 1/4 inch. Pull the pin out of the bottom of the strut, being careful not to stretch the brake hose.
9. Remove the 3 nuts and washers from the top rack mount. Remove the stand from the machine, making sure that the retaining cables do not move.
10. Installation of a rack is made in reverse order. Pay attention to the following points:
- A. Use new self-locking nuts on the top strut mount and on the stub axle clamp.
- b. After the machine is lowered onto the wheels, tighten all fasteners to the desired torque.
- V. If the pole does not fully engage the stub axle clamp, lower the machine to the ground, loosen the clamp nut, place the tine correctly, and retighten the nut.
- d. If you have replaced the stem, tighten the stem nut to the correct torque and then lock it by driving its collar into the groove on the stem. When tightening the nut, keep the stem from rotating.
