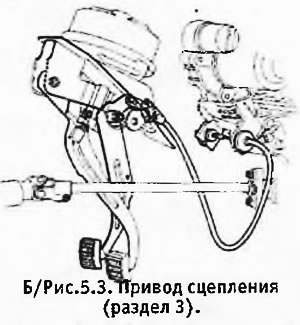
Note: The clutch cable must be replaced after each removal (the old cable cannot be replaced). The cable should not be lubricated, during its manufacture it is lubricated with a special lubricant that does not mix with conventional commercially available lubricants.
1. Jack up and support the front of the machine. Engage handbrake.
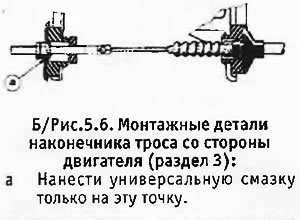
2. Loosen the lock nut and turn out the adjusting nut at the end of the cable (from the engine side). The slot on the clutch release lever, to which the cable is attached, is made elongated, and the cable, along with washers and nuts, can be pulled out of the lever and thrust bracket.
3. While working in the passenger compartment, remove the floor mat and soundproof cover near the clutch pedal in order to gain access to the pedal mount.
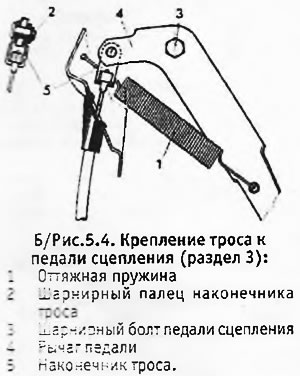
4. Unhook the release spring from the pedal, unscrew the nut and remove the pivot bolt. Disconnect the end of the cable from the pedal lever (see b/fig. 5.4).
 |  |
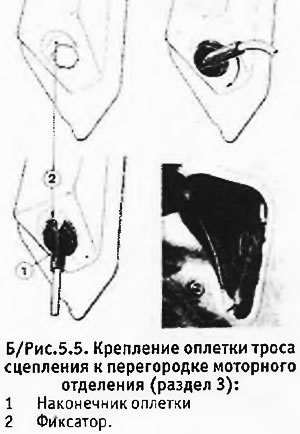
5. To detach the outer sheath of the cable from the bulkhead of the engine compartment, pull the retainer out of the hole in the flange on the bulkhead and turn the tip of the sheath by 90°. This will align the 2 mounting tabs with the holes in the flange and the cable can be pulled forward into the engine compartment. Remove rope.
6. Installation of a new cable is carried out in reverse order. Pay attention to the following points:
- A. Lubricate the clutch pedal pivot bolt and the end of the cable that attaches to the pedal with multipurpose grease. It is forbidden to lubricate the cable itself in its outer sheath.
- b. Install a new Nylstop type nut onto the pedal pivot bolt and tighten it to the correct torque.
- V. Install rubber washers, metal washers and nuts on the end of the cable from the engine side in the order in which they were before removing the cable. Apply some multipurpose grease to the cap adjusting nut where it touches the clutch release lever.
- d. Adjust the clutch when finished (see section 2).
 |  |
