
Pic. 5.43. Gear Shift Mechanism: 1 - cable of the gear selection mechanism; 2 - jet lever; 3 - drive cable
The gear change mechanism is shown in fig. 5.43.
To remove the gearshift mechanism:
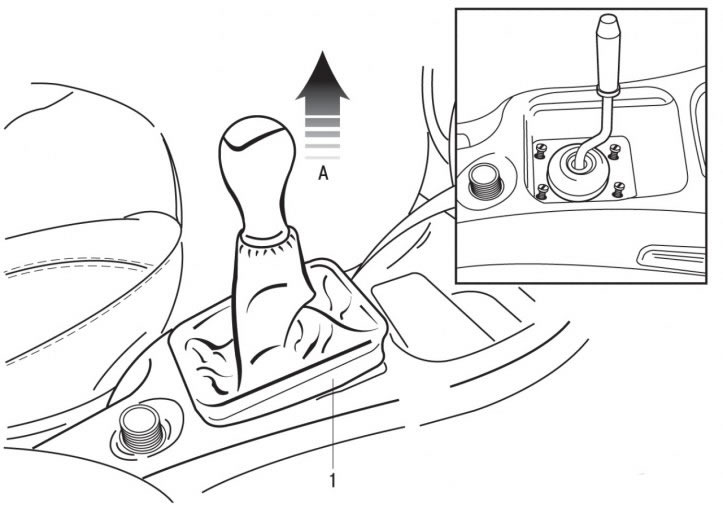
Pic. 5.44. Removal direction (A) corrugated cover (1) from gear lever
- remove the lower part of the bellows 1 (pic. 5.44) from the center console;
- pulling up, remove the handle with a corrugated cover from the gear lever;
- remove the center console;
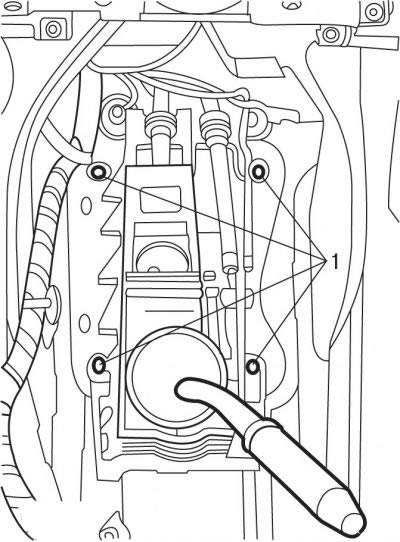
Pic. 5.45. Nut location (1) gearshift mountings
- unscrew and remove four nuts 1 (pic. 5.45) fastening of the gear shift mechanism;
- remove the air filter, crankcase ventilation hoses, air filter / air flow meter pipe;
- remove the battery;
- remove the mudguard of the left front wheel arch;
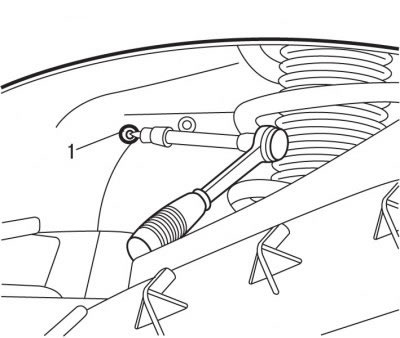
Pic. 5.20. Removing a bolt (1) battery support mountings
- from under the arch of the left front wheel, unscrew the bolt 1 (see fig. 5.20) fastening of a support of the accumulator battery;
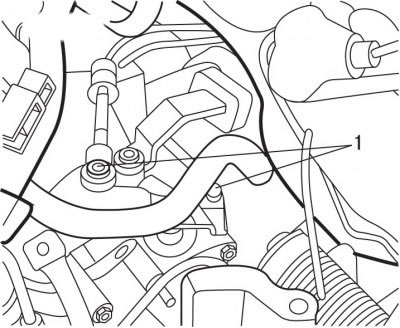
Pic. 5.46. Arrangement of hinged connections of drafts of the mechanism of a gear change (1) on the gearbox
- using FACOM U53 K2 and FACOM U53 T2 universal pullers, disconnect the swivel joints of the gearshift rods 1 (pic. 5.46) from the gearbox;
- lift the car;
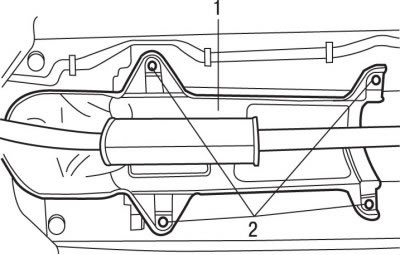
Pic. 5.47. Location of the heat shield (1) and bolts (2) mounts
- unscrew the bolts 2 fastening the heat-reflecting screen 1 (pic. 5.47) and lay it on the pipe of the exhaust system;
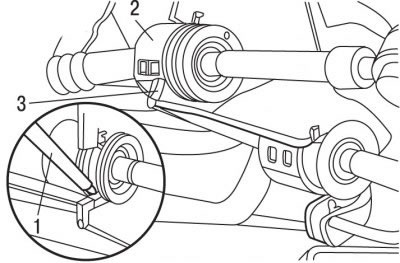
Pic. 5.48. Removing shifter cables: 1 - screwdriver; 2 - cables of the gear shift mechanism; 3 - bracket
- use a screwdriver blade to disconnect the shift cables from the bracket (pic. 5.48);
- remove the gearshift mechanism.
Installation is carried out in the reverse order of removal, taking into account the following:
- apply a thin layer of grease to the hinge heads;
- tighten the nuts securing the gearshift mechanism to a torque of 8 Nm;
- install the center console;
- install the handle with bellows on the shift lever and attach the lower part of the bellows to the center console.
