Attention! The coolant is changed on a cold engine. Avoid getting coolant on painted body surfaces and clothing. Otherwise, wash the area where the coolant has entered with plenty of water.
Coolant drain
1. Remove the cap from the expansion tank. To do this, turn the cap counterclockwise until the first lock, wait until the residual pressure in the cooling system is relieved, then press the cap down and in this position turn it counterclockwise until the second lock and finally remove the cap.
2. Remove the mudguard under the engine compartment and install the container under the radiator on the left side.

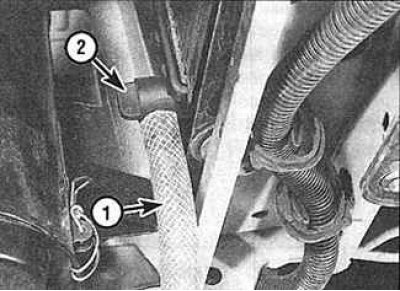
3. Loosen the drain plug on the radiator and allow the coolant to drain into a container. If necessary, can be attached to the drain hole (2) line segment (1) a suitable pipe for directing the coolant drain jet.

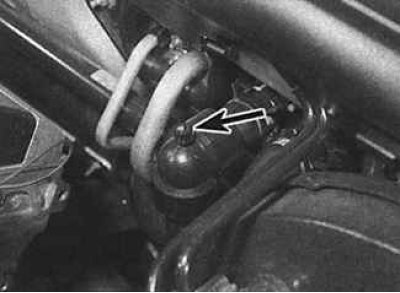
4. To speed up the draining of the coolant, open the screws (indicated by an arrow) removing air from the cooling system. The screws are located in the heater hose connector on the bulkhead of the engine compartment and on top of the thermostat housing. On some models, the bleed screw may be on the upper left side of the radiator.
5. When the flow of coolant from the radiator stops, place a container under the cylinder block drain plug. On 1.6 and 1.8 liter models, the drain plug is located on the front side of the cylinder block, and on 2.0 liter models, on the rear side of the cylinder block.
6. Remove the drain plug and allow the coolant to drain from the cylinder block.
7. After draining the coolant, screw on the radiator caps and on the cylinder block.
Flushing the cooling system
8. The coolant must be changed periodically, and the cooling system must be flushed, because. rust and dirt form in the channels of the system. The radiator must be flushed regardless of the engine.
Flushing the radiator
9. To flush the radiator, it is necessary to pinch the radiator outlet pipe and open the coolant drain screw.
10. Remove the coolant hoses from the radiator.
11. Insert the hose into the inlet of the upper radiator tank, turn on the water and flush the radiator until clean water appears from the lower radiator tank.
12. If it is not possible to flush the radiator with clean water, then use a detergent.
Engine flush
13. To flush the engine, unscrew the drain plug of the cylinder block, the air bleed screws and remove the thermostat.
14. Disconnect the cooling system hoses from the radiator and supply a stream of clean water through the hose to the engine block and flush it until clean water appears from the lower hose leading to the radiator.
15. Install the thermostat and connect the cooling system hoses.
Filling the cooling system
16. Before filling the cooling system, make sure that all hoses and clamps are in good condition. Note that the antifreeze mixture must be used all year round to prevent corrosion. Also check that the radiator cap and cylinder block drain plugs are in place.
17. Remove the cap from the expansion tank.
18. Unscrew screws of removal of air from the cooling system.

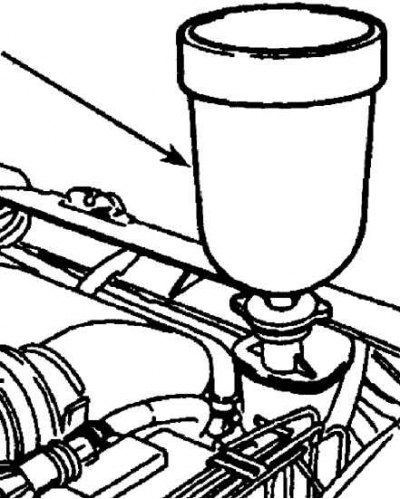
19. Install an additional tank (indicated by an arrow) on the expansion tank and slowly fill the system. Additional reservoir on the expansion bottle and slowly fill the system. The additional tank must be installed on the expansion tank hermetically, which will ensure that the highest points of the cooling system are filled.
20. As the cooling system is filled with liquid, as soon as a refrigerant free of air bubbles appears from under the air bleed screw, gradually, starting from the bottom screws, tighten the screws. The additional reservoir must be full during the entire process of filling the system.
21. After filling the cooling system, tighten all screws and install the plug on the expansion tank.
22. Start the engine and warm it up to operating temperature, then check the coolant level and top up if necessary.
