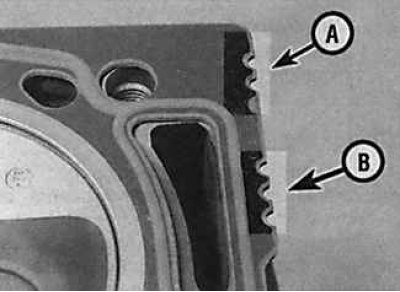
| Piston protrusion | Gasket identification by thickness |
| 0.54 to 0.65 mm | 1 incision |
| 0.65 to 0.77 mm | 2 notches |
| 0.77 to 0.82 mm | 3 notches |
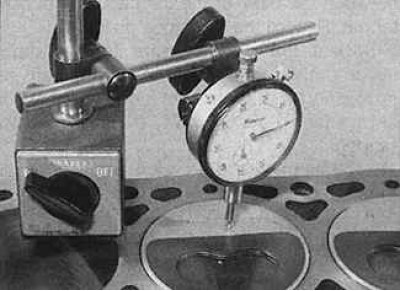
1. Check that the toothed belt is removed from the high pressure fuel pump pulley, then rotate the crankshaft until the pistons of the 1st and 4th cylinders are at TDC. Install the dial gauge on the bracket to the cylinder block. Install the measuring tip on the cylinder block and set the indicator scale to zero. Install the measuring tip on the piston of the first cylinder and turn the crankshaft slightly in both directions. Note the highest value on the indicator and record this value.

2. Similarly, measure the piston protrusion on cylinder #4, then rotate the crankshaft 180°and repeat the piston protrusion measurements on cylinders 2 and 3.
3. In the absence of a dial indicator, the amount of protrusion of the pistons can be measured with a caliper, but with less accuracy.

4. Using the largest piston protrusion, determine the required cylinder head gasket (A - notches indicating the thickness of the gasket). Note that the notches on the gasket closer to the center are identification notches (IN) and have no bearing on the thickness of the gasket.
