Steering column covers
Removing
1. Remove the four screws securing the bottom cover (pic. 30.1).
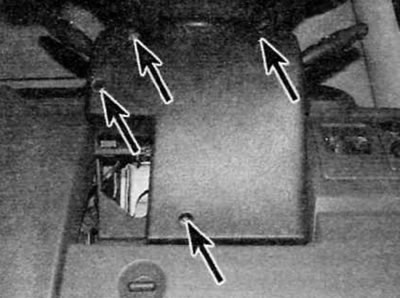
Pic. 30.1. Remove four screws (marked with arrows) lower steering column cover
2. Remove the bottom cover, then lift up and remove the top cover (pic. 30.2).
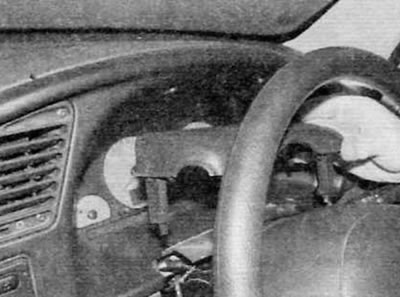
Pic. 30.2. Remove the bottom cover, then lift up and remove the top cover
Installation
3. Installation is carried out in the reverse order of removal.
Top section of front panel
Removing
4. Remove the lower and upper casings of a steering column as it is described above.
5. Remove the three screws and remove the center vent from the front panel (pic. 30.5, a, b).
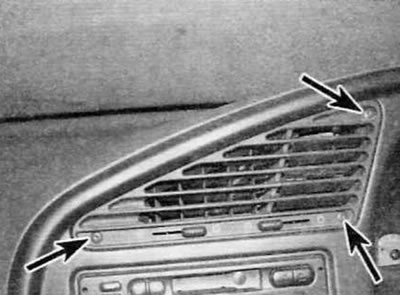
Pic. 30.5 a. Remove three screws (marked with arrows)...
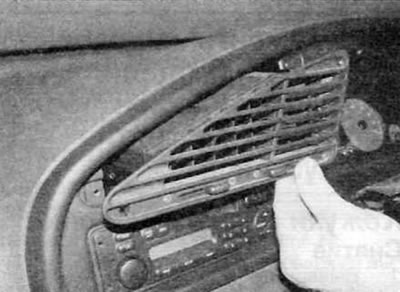
Pic. 30.5, b....and remove the center vent from the front panel
6. Remove the audio unit and base frame as described in chapter 12.
7. Remove the two screws securing the upper section of the front panel, located above the instrument panel (pic. 30.7).
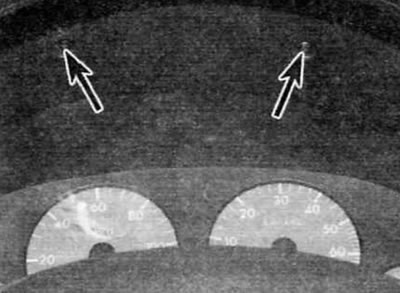
Pic. 30.7. Remove the two screws securing the upper section of the front panel above the instrument panel (marked with arrows)
8. Similarly, unscrew the screws securing the upper section, located below the instrument panel and in the opening for the audio unit (pic. Z0.8, a, 6).
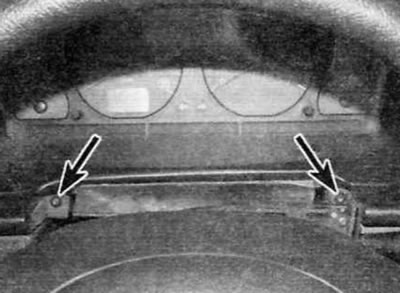
Pic. 30.8, a. Remove the screws securing the top panel below the instrument panel (marked with arrows)...
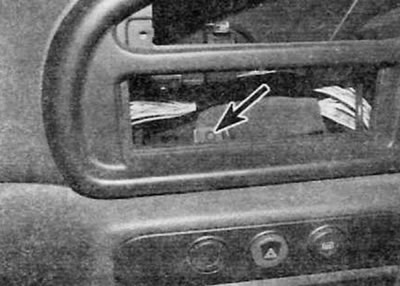
Pic. 30.8, b....and in the opening for the audio unit (marked with an arrow)
9. Pull the top section of the bezel to release the latches and remove it from the vehicle (pic. 30.9).
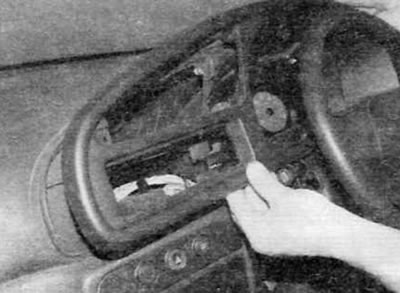
Pic. 30.9. Pull on the top panel to release the latches
Installation
10. Installation is carried out in the reverse order of removal.
Dashboard
11. Refer to chapter 12.
Front panel assembly
Note. This is a complex operation that requires the removal of many elements and assemblies and the disconnection of many electrical connectors. Appropriately mark the location of all detachable wiring or attach labels to the connectors to avoid confusion during installation.
Removing
12. Disconnect the wire «masses» from battery (see «Disconnecting the battery»).
13. Remove the hood grille panel as described in paragraph 24.
14. Remove the electric motor and the lever mechanism of a screen wiper as it is described in chapter 12.
15. Through the opening for the hood grille panel, unscrew the three nuts securing the front panel to the bulkhead.
16. Move the front seats all the way back. Set the steering wheel to position «straight ahead» and lock the steering column lock.
17. Remove the steering column covers and the upper section of the front panel as described earlier in this paragraph.
18. Remove the center console as described in paragraph 29.
19. Remove the steering wheel as described in chapter 10.
20. Remove the following items as described in chapter 12:
- A) dashboard;
- b) audio block;
- V) passenger airbag;
- G) steering column switches.
21. Remove the front panel switches as described in chapter 12.
22. Remove the speaker on the front panel on the passenger side, and then remove the bolt in the speaker opening.
23. Remove the A-pillar trim panels as described in paragraph 28.
24. Turn out two top screws of fastening in each corner of the block of management of a heater/ventilation.
25. Using a small screwdriver, release the locking tab at the bottom center of the control box and remove the box from the front panel.
26. Rotate the control box up as far as space allows, and then release the latches and disconnect the control cables from the box. Mark the location of the cables to ensure proper installation.
27. Disconnect the electrical connector on the back of the control box, and then remove the box.
28. Remove the storage compartment above the heater / ventilation control unit and remove the four screws securing the center panel.
29. Remove an ashtray and turn out two screws in an aperture for an ashtray.
30. Remove the bolt at the base of the front panel above the center console.
31. Remove the fuse box cover and release the fuse/relay box from the fasteners in the front panel.
32. Turn out a bolt and release the handle of opening of a cowl.
33. Turn out on a bolt on each sidewall of the front panel.
34. Disconnect or loosen any remaining front panel fasteners.
35. With the help of a second person, lift the front panel off the mounting location and slide it back. Once there is sufficient space, disconnect all front panel electrical connectors, noting their installation position. Mark the wiring harness wiring and release it from the various clips.
36. Make sure that all necessary items are disconnected and moved to the side, and then remove the front panel from the car.
Installation
37. Installation is carried out in the reverse order of removal. Match all electrical connectors correctly and tighten the appropriate bolts/nuts securely.
