Note. All nuts disturbed during removal must be replaced without fail. This is due to the fact that the threads of these nuts are coated with a compound to lock the threaded connections (designed for one puff only). These nuts include the lower arm ball joint clamp bolt nut.
Note. Two different types of lower control arms can be used. The first type lower arm is a forged steel structure with a removable ball joint, and the second type lower arm is a forged steel structure with a fixed ball joint. The photographs in this paragraph show the suspension arm of the first type.
Removing
1. Place wheel chocks under the rear wheels. Raise the front of the vehicle and securely jack stands under it (see «Lifting and placing the car on supports»). Remove the corresponding front wheel.
2. Remove the nut, then remove the lower arm ball joint clamp bolt from the steering knuckle. Throw away the nut; when installing, use a new one.
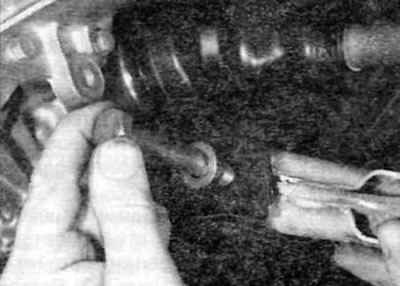
3. Turn out a bolt of the forward hinge of the bottom lever. Remove the nut from the corresponding housing if it is not secured (pic. 6.3).

Pic. 6.3. Remove the Lower Arm Front Pivot Bolt...
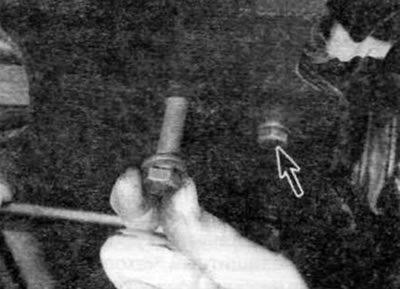
4. Turn out two bolts of fastening of the plug of a back support of the lower arm to a stretcher. Note that the large bolt also serves to secure the anti-roll bar mount clamp (hold the nut if necessary) (pic. 6.4). Remove the nut from the top of the anti-roll bar mounting clip.

Pic. 6.4.... and two bolts for fastening the rear, support sleeve (the second bolt is marked with an arrow)...
5. Drive a small chisel into the slot on the steering knuckle to widen the slot slightly to remove the ball joint pin. Remove the inner end of the arm from the subframe and release the ball joint from the steering knuckle. Remove the protective plate that is located on the ball joint pin.
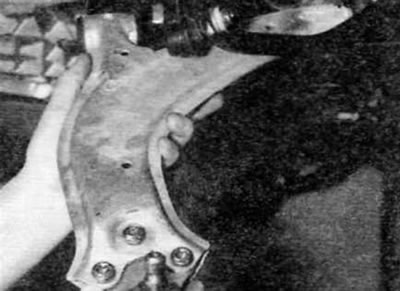
6. Remove the lower arm from under the bottom of the car (pic. 6.6).

Pic. 6.6....then remove the lower control arm from the vehicle
Repair
Note. If the ball joint on the Type 1 lower control arm is to be replaced, new nuts must be used during installation.
7. Thoroughly clean the lower arm and the area around the arm supports, if necessary, removing all traces of dirt and anti-corrosion coating from the bottom of the vehicle. Then carefully check the elements for cracks, deformation or any other signs of wear or damage, paying special attention to the pivot bushings, and replace the elements if necessary. Due to the fact that this procedure requires a number of special tools (including press), the replacement of the pivot bushings should be left to the dealer or other specialists who have the appropriate equipment.
8. Check that the lower arm ball joint moves freely without any signs of binding. Check the ball joint dust boot for signs of deterioration, cuts or cracks. If replacement is needed (which is possible only on the suspension arm of the first type), remove the ball joint from the arm. Install a new ball joint and secure it with new bolts and nuts, which must be tightened to the specified torque.
9. Inspect the lower arm pivot bolt shaft for signs of wear or nicks and replace if necessary..
Installation
10. Return the lower arm to its original position, install the protective plate on the lower arm ball joint, and then insert the ball joint pin into the steering knuckle. Make sure that the protrusion on the protective plate fits correctly into the clamping slot.
11. Insert the ball joint clamp bolt, then screw on the new nut and tighten it to the specified torque.
12. Install the front pivot bolt and hand tighten only. Make sure that the nut is fixed in the corresponding housing.
13. Screw in the bolts and screw on the rear hub mounting nut, making sure that the hub bracket is located between the subframe and the anti-roll bar clamp. Tighten nuts/bolts to specified torque.
14. Install the wheel, then lower the vehicle and tighten the wheel bolts to the specified torque. Rock the vehicle as you would when checking shock absorbers until the disturbed components are in a stable position, and then tighten the lower arm front pivot bolt to the specified torque.
