Removing
1. Remove the exhaust manifold as described in paragraph 18. The turbocharger and exhaust manifold are removed from the engine as a single unit. The turbocharger can then be separated from the manifold on a workbench as described below.
2. Turn out four bolts of fastening of an elbow outlet branch pipe to the case of a turbocharger and separate an elbow branch pipe from a turbocharger.
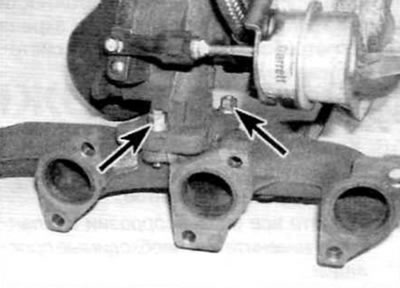
3. Remove the three nuts and remove the turbocharger from the studs on the manifold (pic. 20.3).

Pic. 20.3. Nuts of fastening of a turbocharger to a final collector (marked with arrows)
Inspection
4. After removing the turbocharger, inspect the case for cracks or other visible damage.
5. Rotate the turbine wheel or compressor wheel to make sure. that the shaft is not damaged, and by touch make sure that there is no increased runout or uneven movement. Some backlash is normal, because during operation the shaft «floats» on an oil film. Make sure the wheel blades are not damaged.
6. If there is oil contamination in the exhaust or suction ports, the turbocharger shaft seals are probably out of order.
7. Do-it-yourself repair of the turbocharger is not possible, and none of the internal or external parts are supplied separately. If a faulty turbocharger is suspected, a new one should be purchased (or refurbished) unit.
Installation
13. Installation is carried out in the reverse order of removal, taking into account the following points:
- A) If a new turbocharger is being installed, change the engine oil and filter. Also replace the filter in the oil supply line.
- b) Before assembling the oil supply pipe fitting, prime the turbocharger by injecting clean engine oil through the oil supply pipe fitting.
